3D Printing
I recently decided to invest in a 3D printer. I got myself a Velleman K8400 kit and built it over the course of a few evenings and a weekend. One thing that drove this decison was a discussion with a friend about antenna rotators and they mentioned the SatNOGS project. I didn’t think too much about it at the time as he said it was 3D printed and I didn’t own a 3D printer. I decided to take a look at it just to see if I could borrow any ideas but I liked what I saw so I bought the printer and started experimenting. I found several things which put me off building a pure SatNOGS rotator. The version 1 I found the tollerances on the 3D printed gears to be too small for what I could manage however the Version 3 was much better in that regard but that used an expensive extruded aluminium frame with expensive propiatory fittings so I decided to use the gears from the SatNOGS v3 and print my own frame. This project is still very much in progress and all the design files will be released here once I’m happy with them. I took my initial prototype to the radio club on Friday evening and people seemed rather impressed with it. Bob G3VCA took my photo with it and said he’d try and get it mentioned in RadCom but I don’t hold out much hope for that as our club never seems to get a mention. Anyway watch this space as that’ll all be documented here soon. I just wanted to post a few other bits and bobs I’ve been printing for now.
So far all my yagi antennas have had their elements mounted by cable tying them to either a wooden boom or wooden spacers screwed to an aluminium boom but they tend to be easy to knock out of alignment so I decided to knock up some designs for a 3d printed element holder and feed point. I’m just printing my first element holder as I type this. Anyway I’ve been using FreeCAD to create the designs then exporting the final shape as an STL file and then importing that into Repetier to generate the gcode for the printer.
The print just finished and here it is ready to be removed from the print bed.
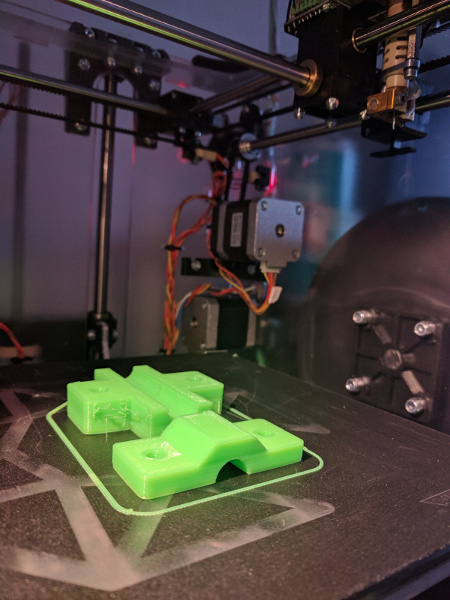
This is in two halves that need to be screwed together and to the boom with a couple of M5 bolts and Nylon lock nuts. The feedpint has holes in the top to put a couple of self tapping screws or M3 bolts down into the ends of the elements so that the coax can be connected via a pair of ring terminals.
Here are the files should you want to print your own. Published under CERN Open Hardware License v1.2
FreeCAD Design for the 12mm diameter element holder assembley
STL file for the bottom half of the 12mm diameter element holder assembley
STL file for the top half of the 12mm diameter element holder assembley
FreeCAD Design for the 12mm diameter feedpoint assembley
STL file for the bottom half of the 12mm diameter feedpoint assembley
STL file for the top half of the 12mm diameter feedpoint assembley
I’m also working on a couple of other items such as Morse keys including one I can attach to the front of my Elecraft Kx3. I made a guy ring for my GRP mast a few weeks ago but I can’t find the design files for that now but it’s very simple cosisting of 6 cylinders. one for the guy ring, and one for the cutout for the mast and four smaller holes for the ropes. If you have any comments or suggestions please drop me a message via the contact form.
73 for now Ben